
Make this Hibachi Fried Rice with Yum-Yum Sauce for dinner instead of getting takeout! This recipe is sneakily vegan, including the sauce. You can whip this up on the stove or in the Instant Pot in no time!

One of the things I missed the most during the pandemic was the ability to go out and sit around a big hibachi grill with a bunch of strangers, all while watching a Japanese chef make your food. When we couldn't go do that, this recipe got me through and made it feel JUST like I had gotten Hibachi takeout!
This recipe is super versatile. You can cook the rice in a rice cooker, Instant Pot, or stovetop, and you can fry the rice on a pan on the stove or by using the Saute function on the Instant Pot! Make this recipe spicier, use different rices, add proteins of choice, etc. - there's so much you can do with it!
Why You'll Love This Recipe
- Just Like the Classic! This recipe tastes just like the hibachi fried rice you'd get at your local hibachi restaurant!
- Everyone will love it - Kids, adults, and everyone in between will find something to love about this recipe!
- Perfect use of leftover rice! If you like to prep a lot of rice at the beginning of the week or just have some leftover, this is the perfect way to use it! Fried rice is best when using leftover rice!
What You Need for this Recipe
Ingredients and Substitutions:

- For the Fried Rice:
- Basmati Rice - Regular long grain white rice or jasmine rice will work as well. I do not recommend using a short grain rice. Brown rice can also be substituted.
- Water
- White Onion
- Vegan Butter - I chose to fry my rice in butter, like the hibachi restaurants do. A neutral oil will work too.
- Frozen Vegetables - Any frozen mixed veggie blend will work. Look for ones that have peas and carrots.
- Soy Sauce - Reduced sodium, coconut aminos, or tamari all work just as well.
- Toasted Sesame Oil - Just a small amount, this can be omitted if needed.
- Seasonings - Garlic Powder, MSG (optional), Salt
- For the Yum Yum Sauce:
- Vegan Mayonnaise - Any vegan mayonnaise brand, or regular mayonnaise, will work!
- Ketchup - Just a small amount. If you would prefer to use tomato paste, just half the amount.
- Rice Vinegar - Unseasoned, regular rice vinegar.
- Spices - Salt, sugar, smoked paprika
Equipment:
- Instant Pot, Rice cooker, or Pot
- Large Pan or Wok
- Small Bowl
- Whisk
- Spatula
How to make this recipe
Step 1: Cook the Rice
If using the Instant Pot, add 3 cups of uncooked rice and 3 cups of water. Pressure cook on HIGH for 4 minutes, then do a natural release for 10 minutes. After the 10 minutes, quick release the remaining steam.
For the stovetop method, add 3 cups of basmati rice and 4 ½ cups of cold water to a pot. Bring it to a boil on high heat, then immediately reduce to low heat and cover the pot with a lid. Allow the rice to simmer for 12 minutes, then remove it from heat and let it rest for 10 minutes.
This will yield 5-5 ½ cups of cooked rice.
Allow the cooked rice to cool in the fridge for at least 1 hour, or up to overnight.
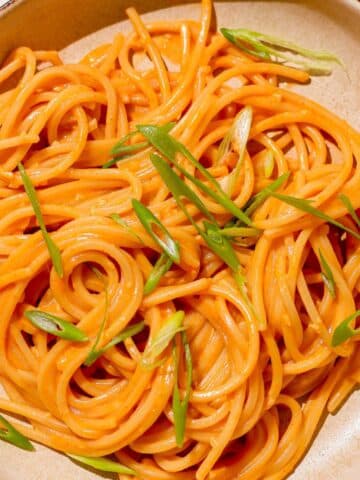
Step 2: Cook the Fried Rice
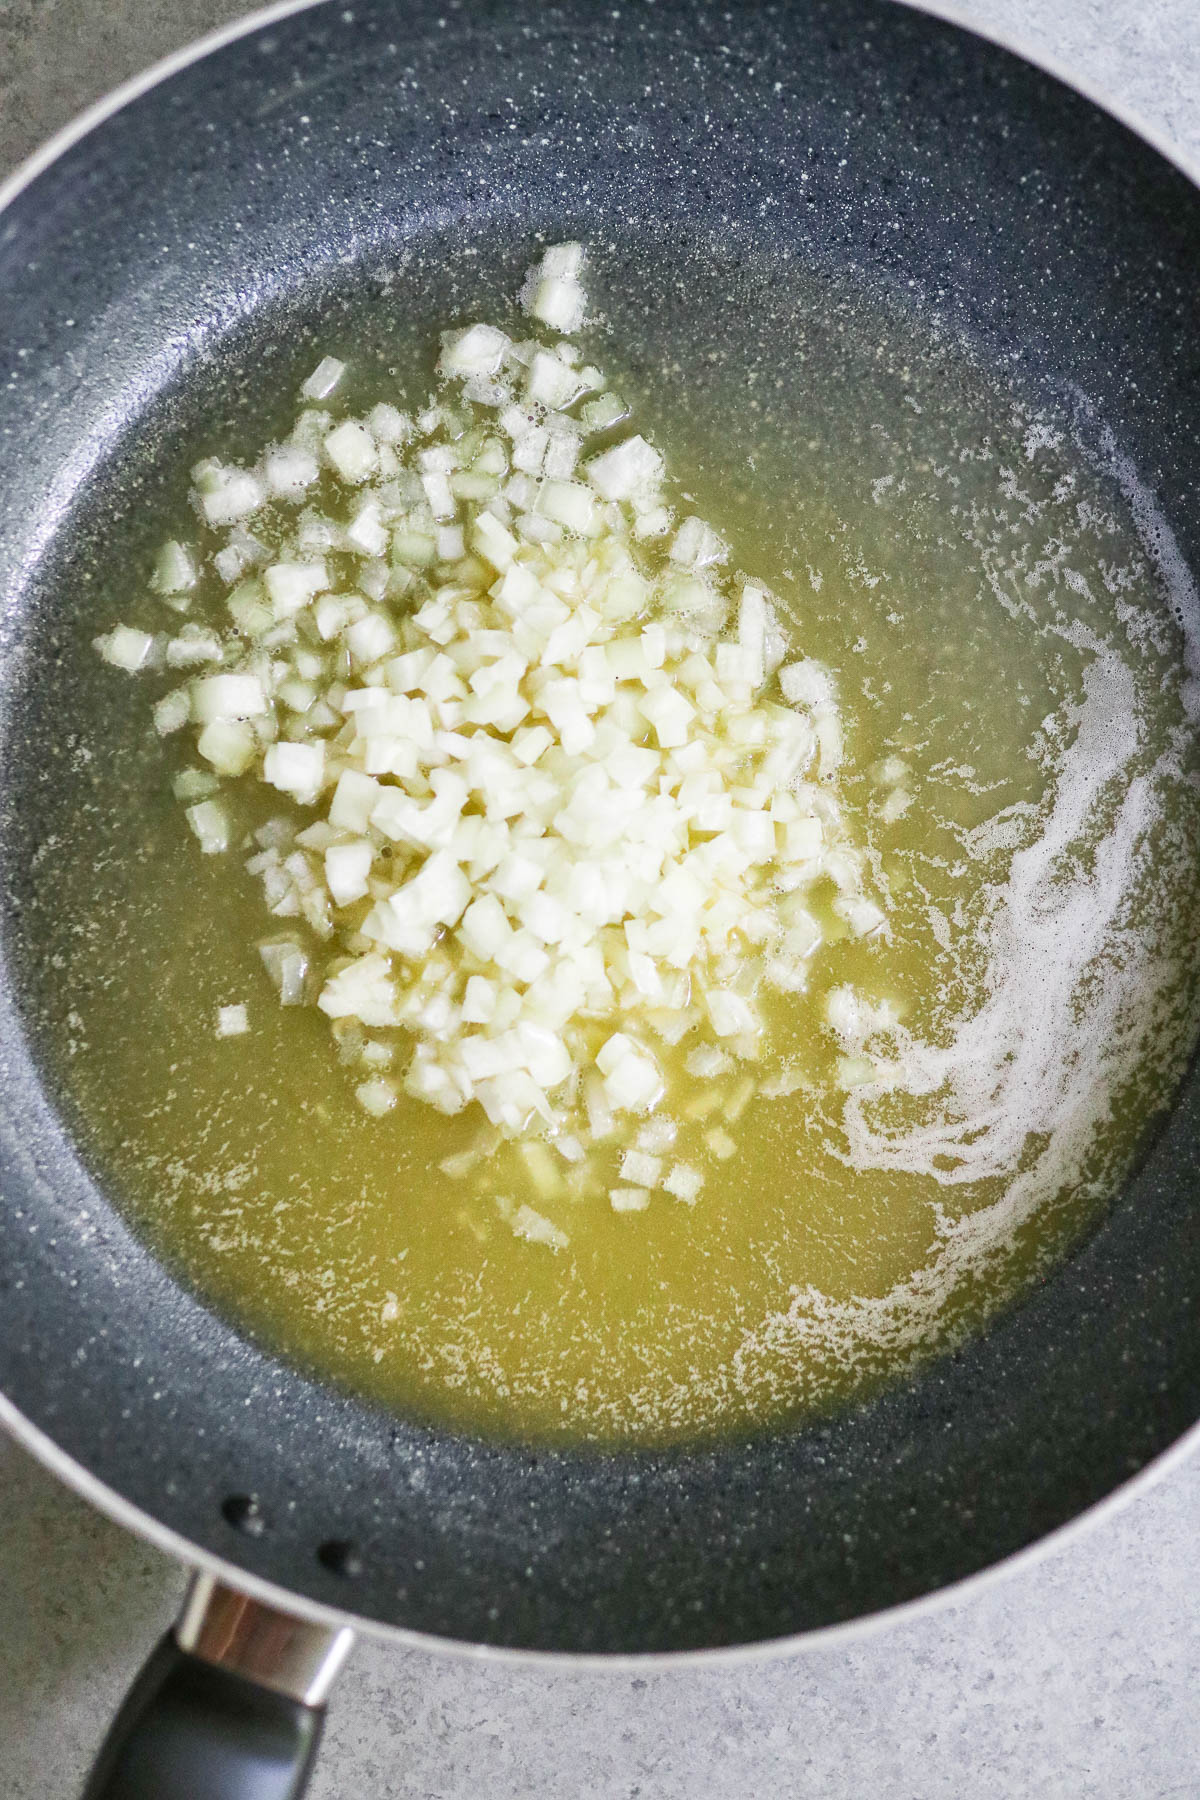
Finely dice ½ of a white onion.
To a hot pan, add anywhere from 2 ounces to 4 ounces of vegan butter until it is fully melted.
Once melted, add the white onion and sauté.
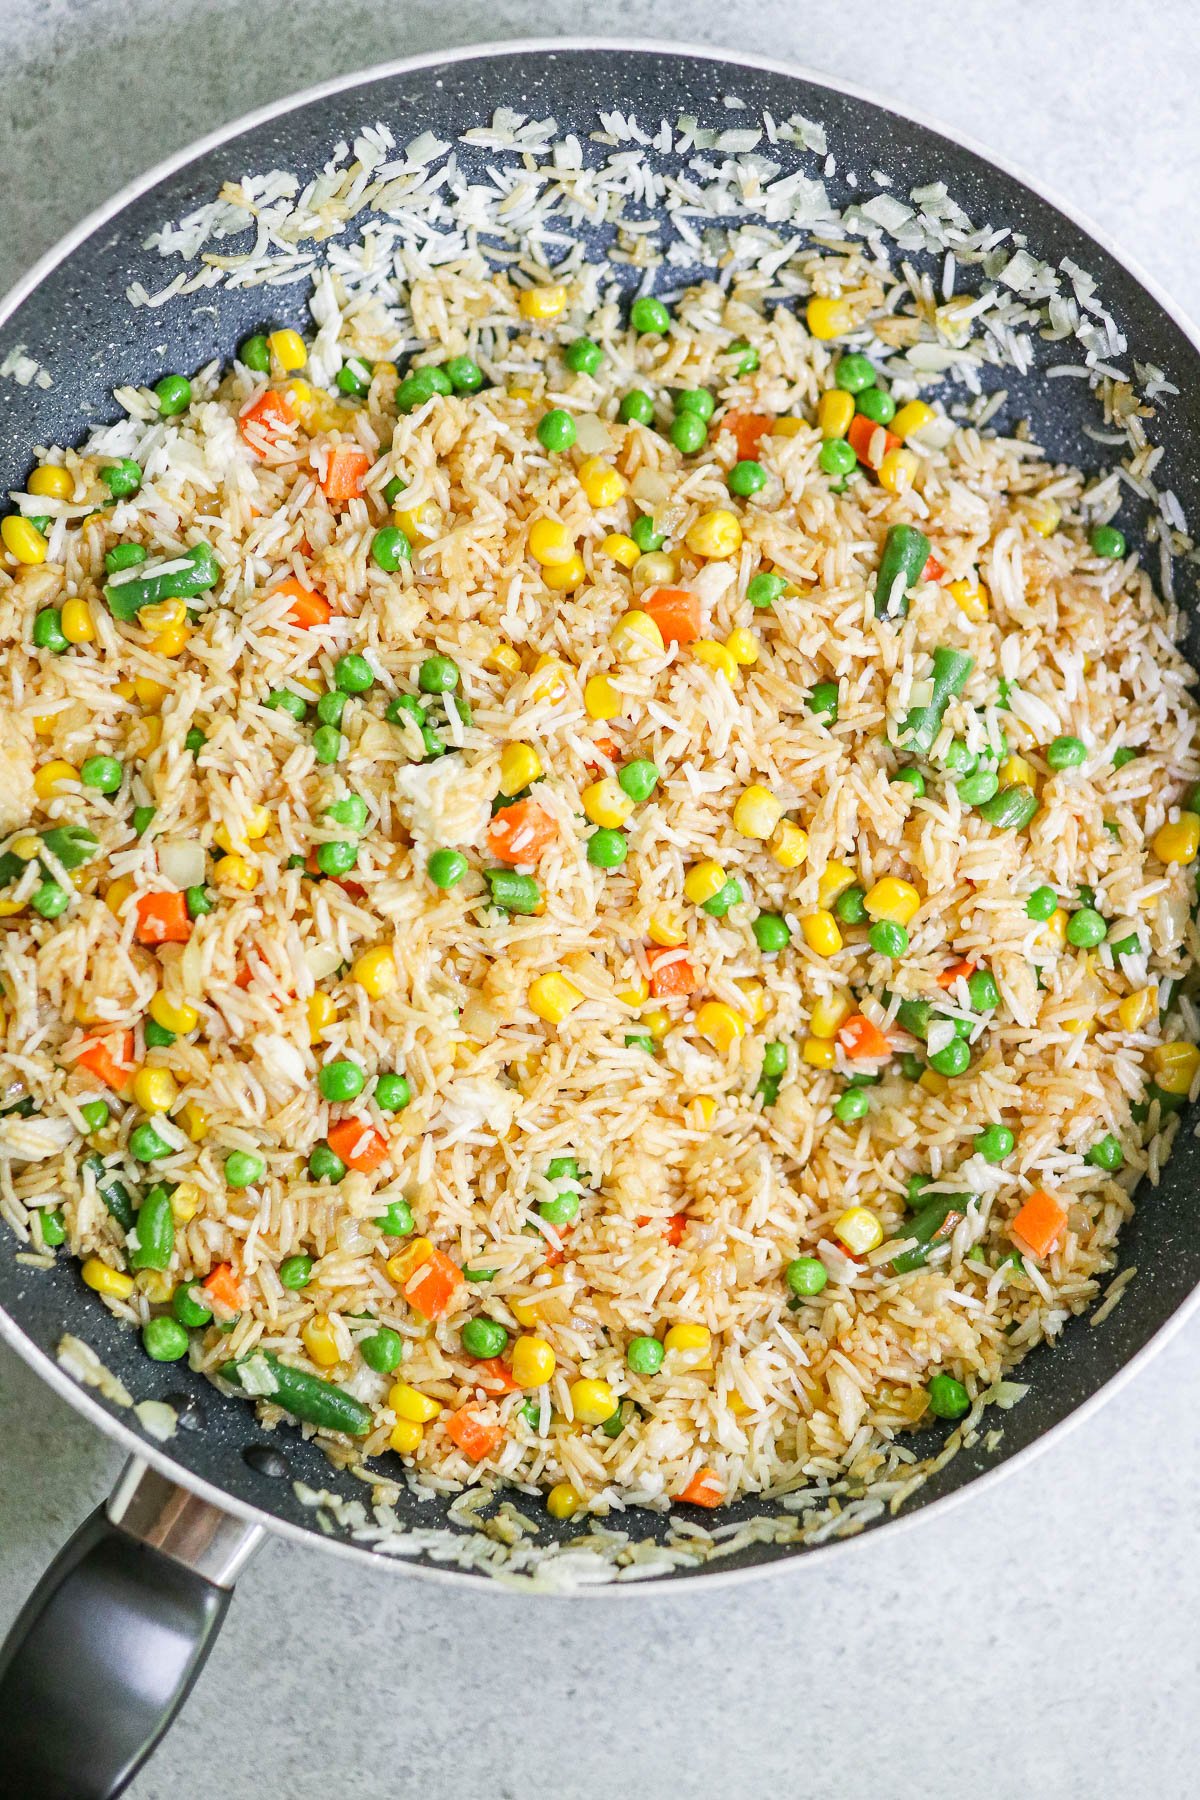
When the onion is translucent, add 5 cups of cooked rice.
Use a spatula and toss the rice in with the butter.
Add 2 cups of frozen mixed vegetables, ¼ cup soy sauce, 1 teaspoon toasted sesame oil, garlic powder, and MSG to the rice and stir until cooked through, hot, and the rice begins to lightly crisp.
Step 3: Make the Yum Yum Sauce
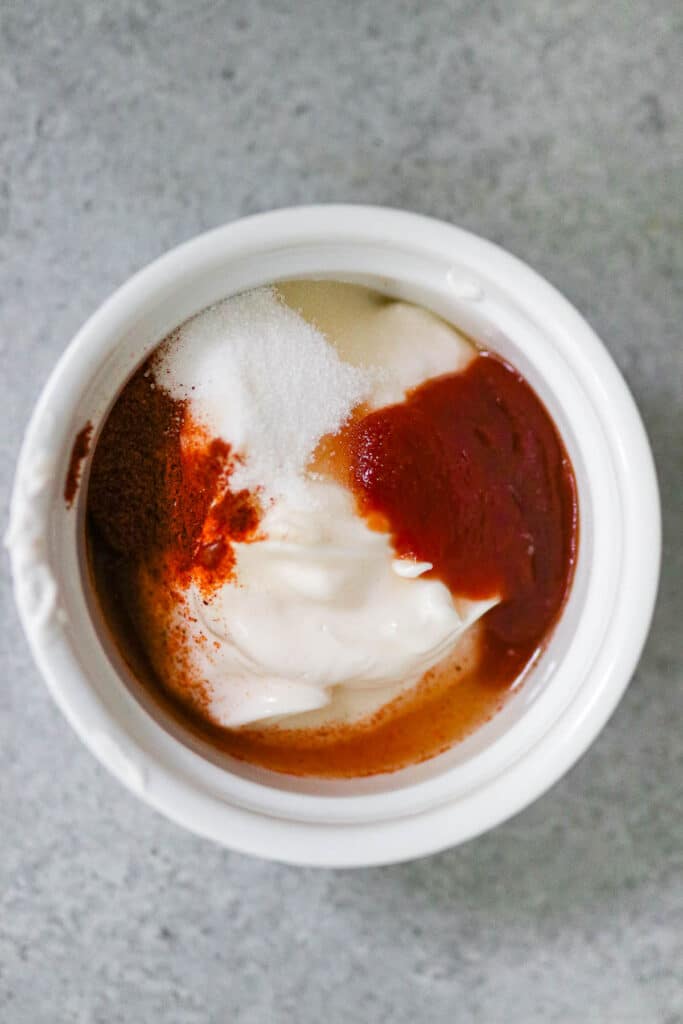
In a small bowl combine ½ cup vegan mayonnaise, 1 tablespoon ketchup, ½ tablespoon of granulated sugar, ½ teaspoon smoked paprika, 1 teaspoon rice vinegar, and ¼ teaspoon salt until fully combined. Add a splash of water to thin.
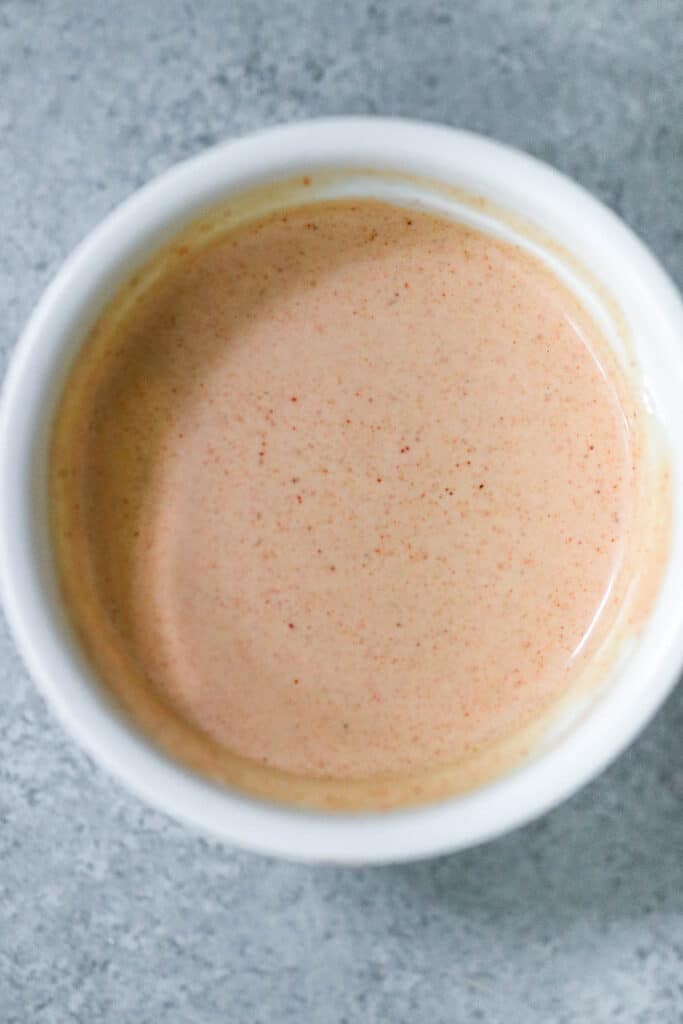
Optional: Add hot sauce to make a spicy Yum Yum sauce!
Step 4: Finishing Touches
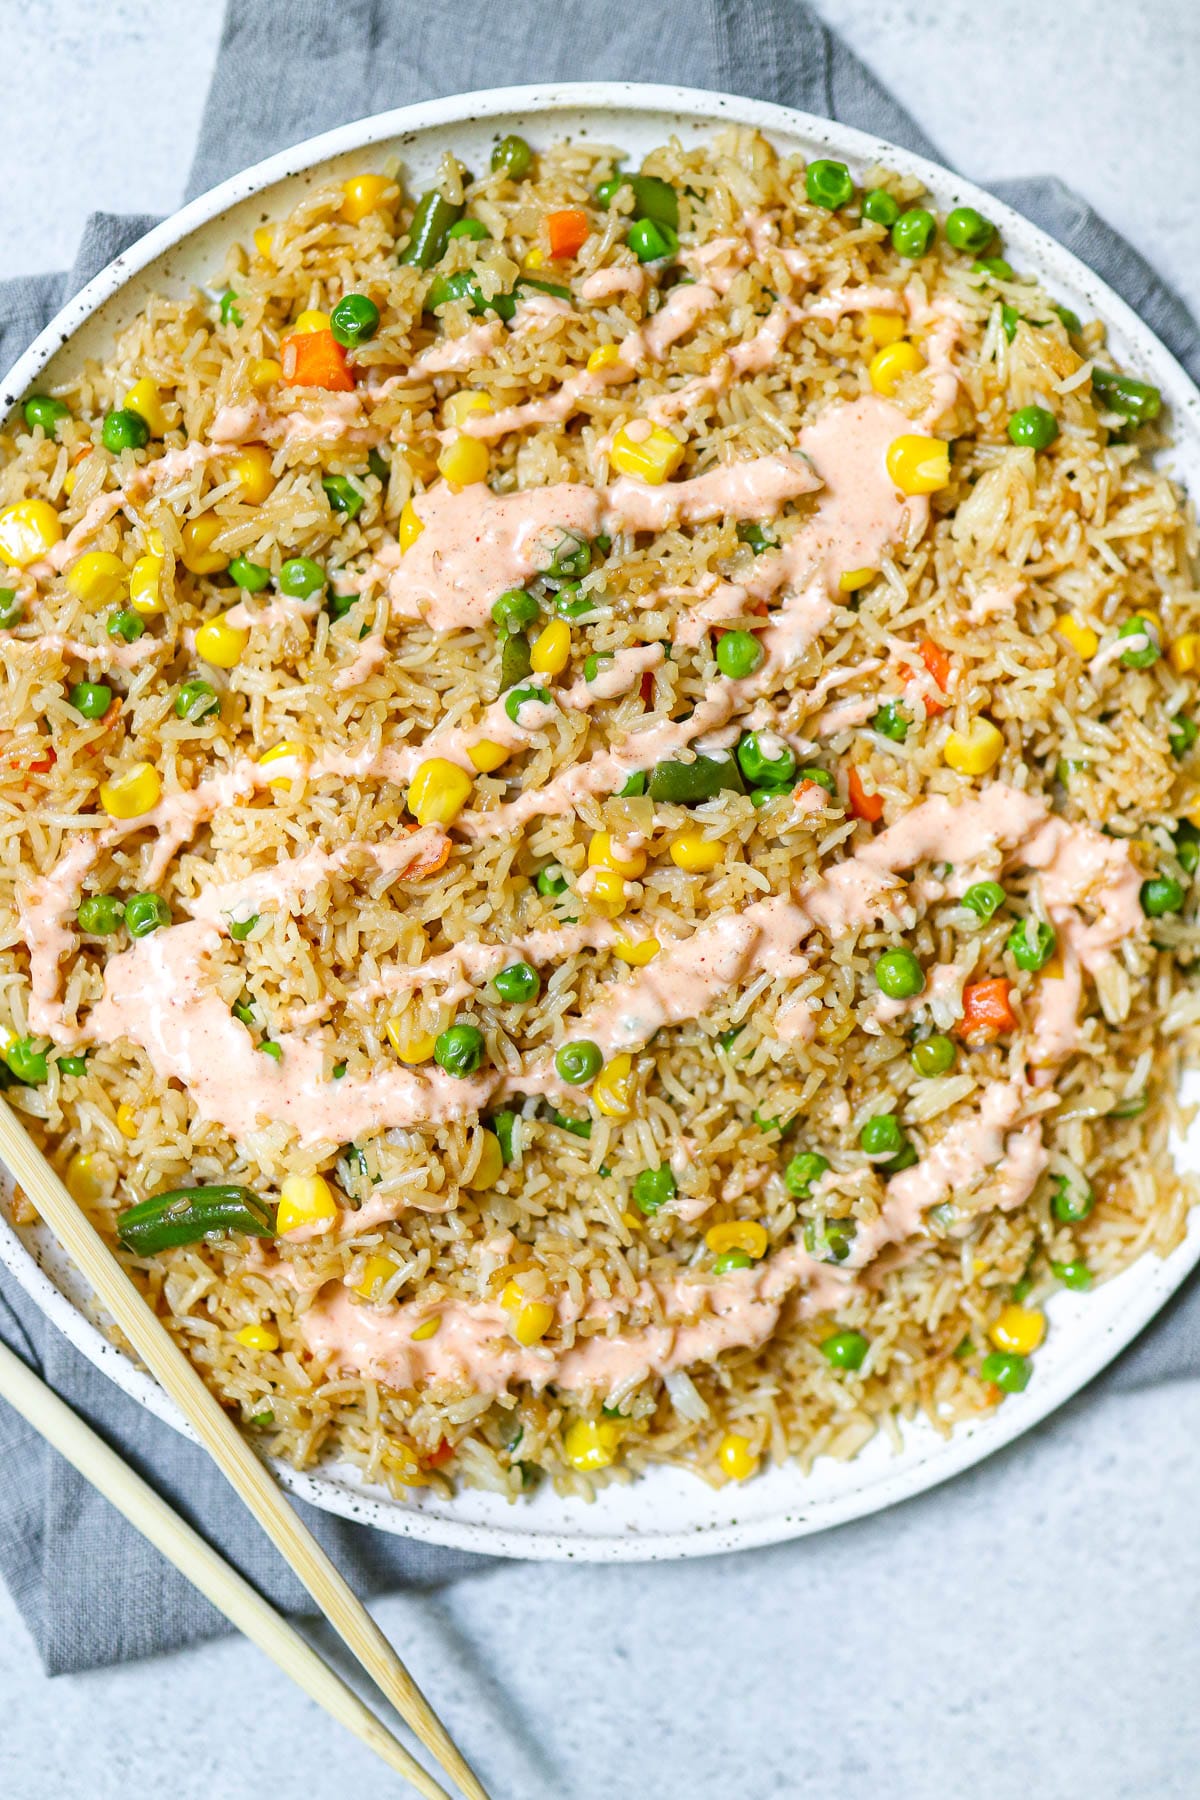
Taste the fried rice and the yum yum sauce and adjust the seasonings to your liking.
Serve the hibachi fried rice on a plate and serve the yum yum sauce on the side, or drizzled on top.
Expert Tips
- Feel free to make this a one-pot recipe by performing all of the sautéing in the Instant Pot, using the Saute functions.
- I chose to fry my rice in butter because that is how the Hibachi restaurants do it. However, you can use oil if you prefer!
- Make this spicy by adding hot sauce or cayenne to the yum yum sauce, or adding sriracha to the finished fried rice.
- Feel free to use a different kind of rice or use brown rice for more fiber. The cooking times may vary.
Recipe FAQs
Yum Yum Sauce is perfect for mixing with fried rice, using as a dipping sauce for shrimp or other proteins or fries, or use it as a topping on tacos!
Yum Yum Sauce is often referred to as white sauce or shrimp sauce. It is not an authentic part of Japanese cooking, so there is no official name.
Long-grain rices are typically best for hibachi fried rice as they get fluffier and not as starchy.
If you enjoyed this recipe, you may also like:
Creamy Dairy-Free Mushroom Stroganoff (Instant Pot)
Coconut Cilantro Lime Rice (Instant Pot)
Vegan Spinach Risotto In The Instant Pot
📖 Recipe

Hibachi Fried Rice With Yum Yum Sauce
Equipment
- Instant Pot/Rice Cooker or Pot
- Spatula
- Large pan or Wok
- Small Bowl
Ingredients
- 3 cups Uncooked Basmati Rice yields 5 - 5.5 cups
- 3 cups Water
- ½ White Onion diced
- 4 ounces Vegan Butter
- 2 cups Frozen Mixed Vegetables
- ¼ cup Soy Sauce reduced sodium
- 1 teaspoon Toasted Sesame Oil
- ½ tablespoon Garlic Powder
- ½ teaspoon MSG optional
Yum Yum Sauce Ingredients
- ½ cup Vegan Mayonnaise
- 1 tablespoon Ketchup
- ½ tablespoon White Sugar
- ½ teaspoon Smoked Paprika
- 1 teaspoon Rice Vinegar
- ¼ teaspoon Salt
Instructions
- Rinse the rice until the water runs clear.
Instant Pot Method:
- Add 3 cups of uncooked rice and 3 cups of water. Pressure cook on HIGH for 4 minutes, then do a natural release for 10 minutes. After the 10 minutes, quick release the remaining steam.
Stovetop Method:
- Add 3 cups of basmati rice and 4 ½ cups of cold water to a pot. Bring it to a boil on high heat, then immediately reduce to low heat and cover the pot with a lid. Allow the rice to simmer for 12 minutes, then remove it from heat and let it rest for 10 minutes.
Fry the Rice:
- Allow the cooked rice to cool in the fridge for at least 1 hour, or up to overnight. This will yield 5-5 ½ cups of cooked rice.
- Finely dice ½ of a white onion.
- To a hot pan, add anywhere from 2 ounces to 4 ounces of vegan butter until it is fully melted.
- Once melted, add the white onion and sauté.
- When the onion is translucent, add 5 cups of cooked rice.
- Use a spatula and toss the rice in with the butter.
- Add 2 cups of frozen mixed vegetables, ¼ cup soy sauce, 1 teaspoon toasted sesame oil, garlic powder, and MSG to the rice and stir until cooked through, hot, and the rice begins to lightly crisp.
- In a small bowl combine ½ cup vegan mayonnaise, 1 tablespoon ketchup, ½ tablespoon of granulated sugar, ½ teaspoon smoked paprika, 1 teaspoon rice vinegar, and ¼ teaspoon salt until fully combined. Add a splash of water to thin.
- Taste the fried rice and the yum yum sauce and adjust the seasonings to your liking.
- Serve the hibachi fried rice on a plate and serve the yum yum sauce on the side, or drizzled on top.
Notes
- Feel free to make this a one-pot recipe by performing all of the sautéing in the Instant Pot, using the Saute functions.
- I chose to fry my rice in butter because that is how the Hibachi restaurants do it. However, you can use oil if you prefer!
- Make this spicy by adding hot sauce or cayenne to the yum yum sauce, or adding sriracha to the finished fried rice.
- Feel free to use a different kind of rice or use brown rice for more fiber. The cooking times may vary.
- Nutrition Information is for 1 serving, which is ⅙th of this recipe which includes the Sauce
- Calories: 547 cal
- Total Fat: 24.8 grams
- Total Carb: 68.4 grams
- Protein: 8.6 grams


Cass says
Looks easy! Can’t wait to try